Sum it up!

Main page - general overview regarding functionalities & version history

Set up your Jira® to sum values from source to destination fields

Gadget which allows you to sum up data and display result in a table

Gadget which allows you to sum up data and data in a 2-d table

Plan workload of your team members using our planning gadget
Sum up values between issues
This functionality enables you to sum up value between issues based on hierarchy, or links and works with numbers as well as with Time Tracking fields. This functionality can be applied for specific project if needed.
Configuration
App configuration is simple. First, open the configuration screen of the app (located in the "Manage Apps" section). Please note you'll need administrator privileges in order to get there. By default, add-on should be switched on for all existing projects.
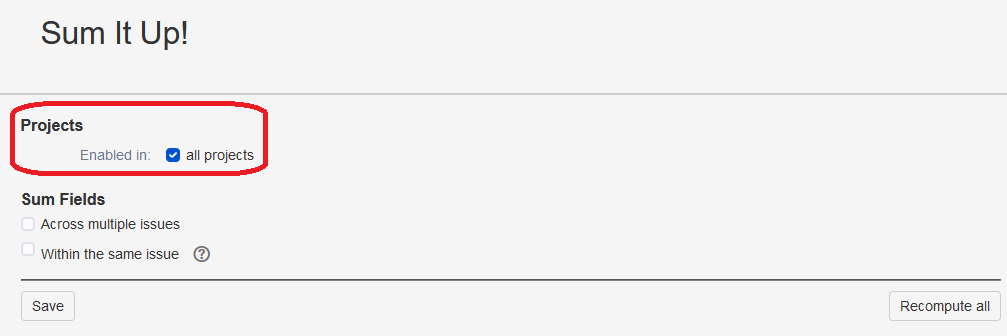
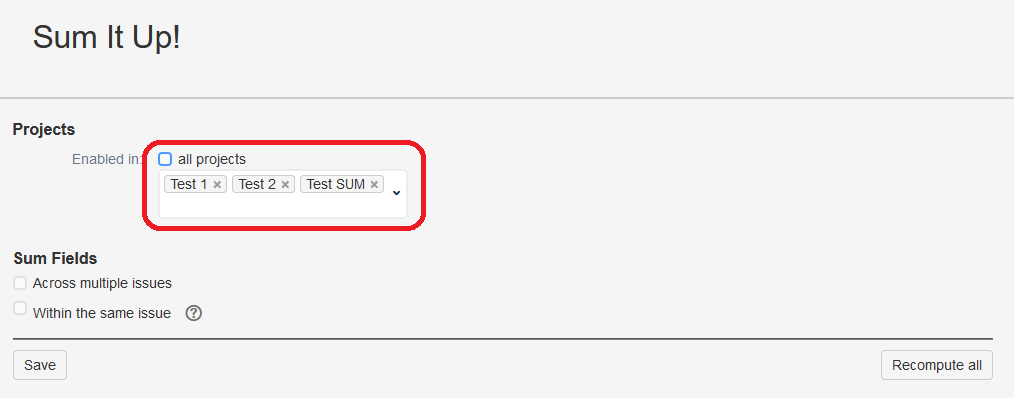
If you wish to apply sum functionality to be switched only for selected projects, please uncheck "all projects" checkbox and select (or type in) projects on which the sum feature will be switched on.
Then, configure the following parameters. These are based on how you want to sum up the values based on hierarchy, or within a single issue as follows:
1. Sum up across multiple issues
- Use standard parent-child link - this feature is allways on (our app counts values from all Sub-tasks to a Story, or all Stories to Epic for the selected fields by default)
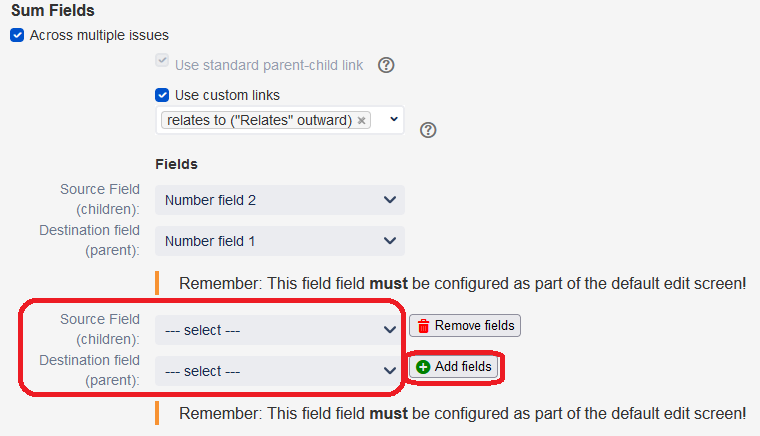
- Source field (children): select custom field, from which the numbers will be taken
- Destination field (parent): select custom field, into which the sum of the numbers from all the relevant issues will be placed
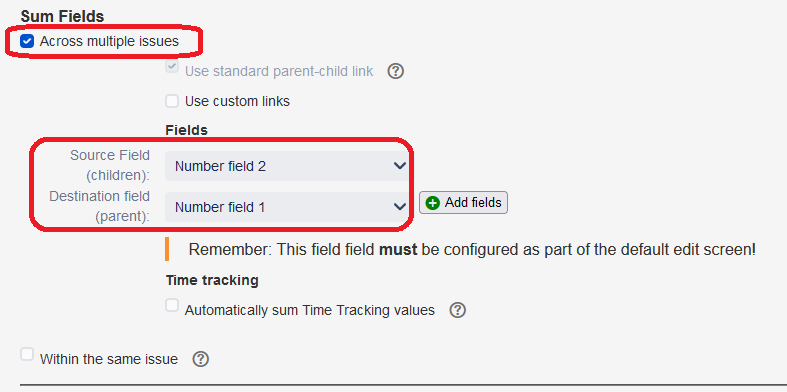
- Press add fields in order to sum up values between multiple fields
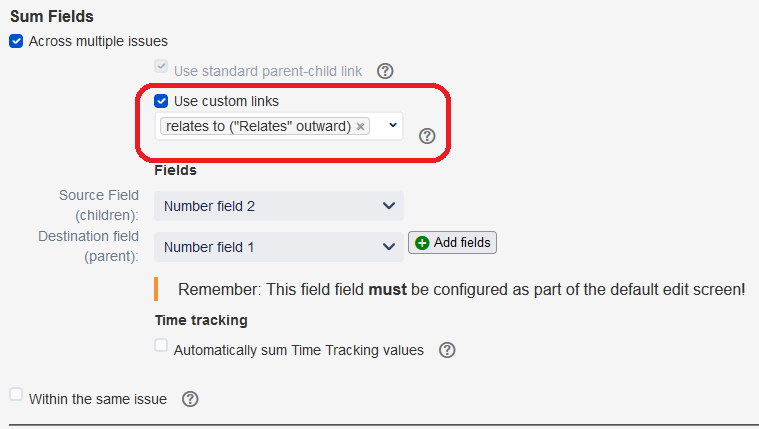
2. Sum up based on custom links
If you wish to sum up values based on specific links (not just based on hierarchy), you can do so by checking the "Use custom links" checkbox. After that you can pick for which relations:
- relates to ("Relates" inward) - links "Relates to" from the child issues will lead to summing up numbers in their parrent issue
- relates to ("Relates" outward) - links "Relates to" from the parrent issue will lead to summing up numbers from its child issues
- relates to ("Clones" inward) - links "Clones" from the child issues will lead to summing up numbers in their parrent issue
- relates to ("Clones" outward) - links "Clones" from the parrent issue will lead to summing up numbers from its child issues
- nothing selected - feature of summing up numbers by links will be switched off
3. Sum up Time Tracking values
Automatically sum Time Tracking values: check if you wan to use sum values from fields Remaining Estimate & Time Spent
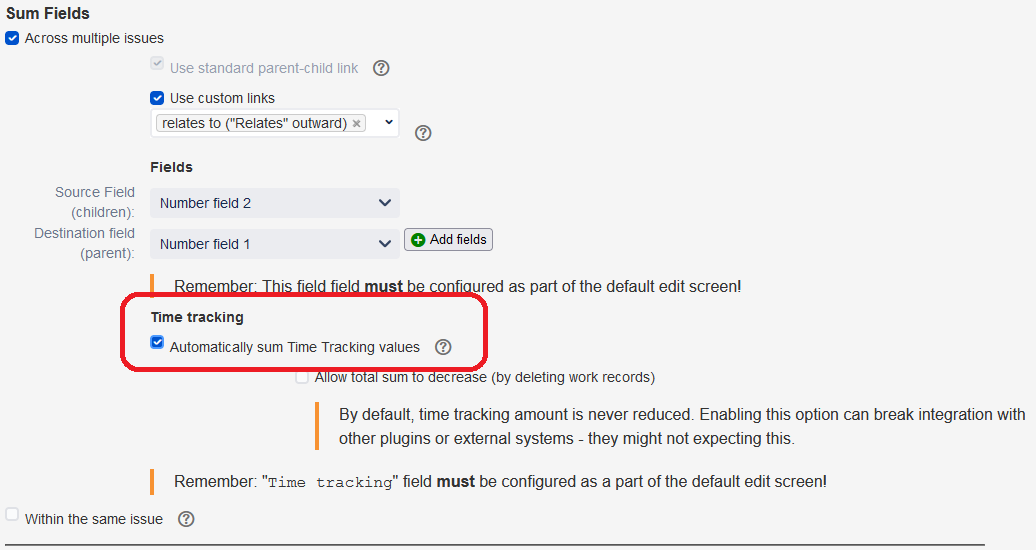
Allow total sum to decrease (by deleting work records): this option can be switched on, if you wish to trigger sum recalculation upon deletion of an issue. But be careful - if you're using other integrations with Jira®, make sure that decreasing Time Tracking values will not cause any harm there (the integrates system might not be ready for that).

4. Sum up within the same issue
- Sum fields in single issue: check if you want to sum values from multiple fields to a different field within the same issue/li>
- Source fields: select up to 5 fields from which the sum will be calculated
- Destination field: select field into which the sum of the above selected fields will be calculated

5. Fixing configuration problems
If all the fields used by Sum it up! App are configured as editable on the Edit screen, you will not see this button. On the other hand, if some of the fields are not present on the configuration screen, you should be able to do so by simply pressing the "Fix it" button. There still might be cases, in which the App will not be able to do so. If this is your case, please see a brief description on how to do this below.

6. Whenever happy with your configuration, please press "Save"

7. Finally, if you wish to apply the sum up feature to issues already existing in your project, please press "Recompute all"

Adding fields to Edit Screen
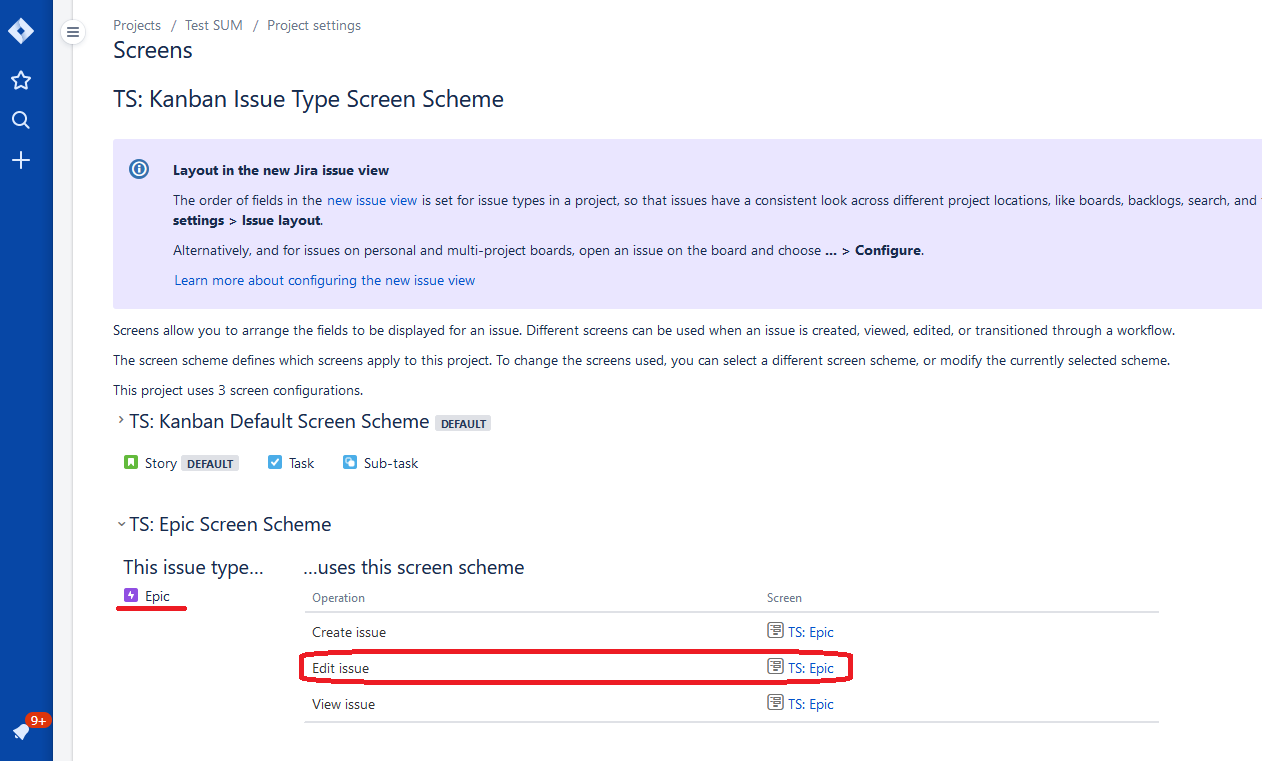
As a pre-requisit, to enable calculation in the required fields, the destination field needs to be present on the Edit issue screen (as in the example below).
